DIY Draft Keg Table

Ultimate homebrewing home bar
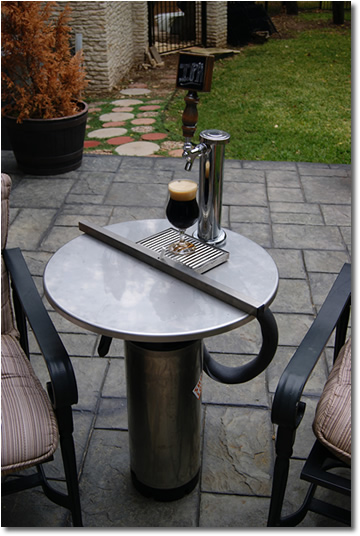
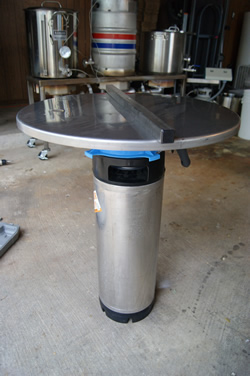
Create a unique homebrew dispensing station using a 5 gallon homebrew keg and a draft tower table top.

The beers had been made and I was ready for our annual holiday homebrew tasting party which traditionally consists of three to four different brews and a few dozen friends. This year would be different.

After building the Ultimate Homebrewer's Bar back in the Nov 2011 issue of Brew Your Own Magazine I somehow convinced myself to do more even with a baby on the way and after recently moving into a new home. This year we would have upwards of fifty invitations going out and seven beers on tap for the party. I had room for six beers on tap in my kegerators, but I had no place for the seventh. Enter draft keg table to save the day.

The keg table would solve another issue which was seating. With the possibility of fifty plus beer drinkers arriving I needed more spots for people to hang out. The functional dispensing table would create a unique place for a few friends to sit and enjoy some homebrews. Whoever was sitting at the table also got to play bartender for newbies trying to figure out what the weird tower table thing in the corner was. A classic beerversation would ignite.

Temperatures would be tip toeing around fifty degrees during the party, so I thought I could take advantage of nature's refrigeration and put a keg outside with a top and draft tower. This all sounds good in theory, but how do you make it functional, easy to move and easy to reuse? Kegs go quick, so I needed to have an easy way to lift off the top and click in a new keg when needed.

I had an old stainless steel fermenter lid, draft tower and some false bottoms to work with. (If you don't have an old fermenter lid you can get flat top stainless steel kettle lids that would work too.)

Placing the table top on the keg I could see this was not going to be a simple drop and go project. I needed a way to elevate the lid so it would not touch the CO2 charger and beer line MFL disconnect.

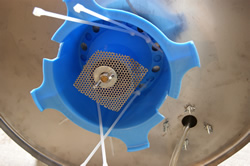
I scanned the brewhouse for usable parts and eyed a carboy drying rack that looked to be about the perfect width and height for what I needed. A few quick snips of some plastic and I was able to fit the carboy rack perfectly over the quick disconnects and create a sturdy and level base for the table top.

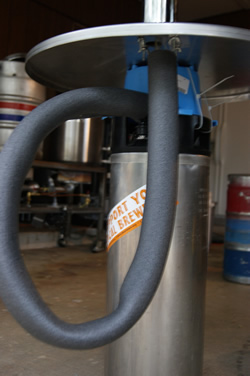
I realized I would also need to insulate the beer lines, fasten down the table top to the keg as well as fasten down the tower to the table top. The last thing I wanted was for someone to put a brew down on the table and find out that it doubles as a catapult.

I made a run to the hardware store and got an assortment of tie downs, and nuts and bolts and some HVAC insulation for the beer line. I also hit the homebrew shop and grabbed some CO2 cartridge refills to get this brew party started.

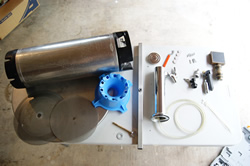
Parts, equipment & tool list

• 5 gallon Cornelius keg
• Carboy drying rack
• Stainless steel round top
• Perforated steel (false bottom)
• Draft tower, faucet and tap handle
• Draft tower fastening nuts and bolts
• Zip ties
• Crossbar with wing nut screw and washer

• Portable CO2 keg charger
• MFL gas and liquid quick disconnects (threaded)
• 1/4" x 5/16" standard swivel nut set
• Faucet wrench
• Power drill
• Step bit
• Dremel with grinding stone bit
• Snip scissors


Draft Table Parts

Draft Table Co2

Draft Table Top

Draft Table Tie Down

Draft Table Final

Draft Table Insulation

1. GATHER THE HARDWARE
Most of the gear gathered here was just parts I already had lying around, so you might have to get creative if you are going to build a keg table yourself. I used a ball lock homebrew keg and MFL quick disconnect fittings along with a portable CO2 keg charger. You could also setup a CO2 tank and put it behind the keg, but the portable keg charger really makes the table less bulky and easier to move around if needed. (Make sure you have plenty of the CO2 cartridges on hand.) I had a few perforated steel rounds from some old cooler mash tuns and I cut them up and used them as large “washers”. The carboy drying rack was slightly modified, but would still be functional as a drying rack if I ever disassembled the table.

2. GET FITTED
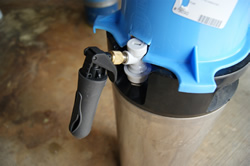
I tightly screwed the CO2 keg charger onto the gas MFL fitting and clicked the gas fitting into the ball lock homebrew keg. On the opposite side of the keg I assembled the beer line MFL quick disconnect and the 1/4" x 5/16" standard swivel nut set. I clicked in the beer MFL and placed the carboy drying rack over the top of the keg, but it needed some small notches cut out to clear the MFLs. I used some snip scissors and cut out ½ in. notches to make the rack sit flush on the keg top. The carboy rack base had L shaped feet and was a perfect fit. It was like they were meant for each other.

3. MAKE SOME HOLES
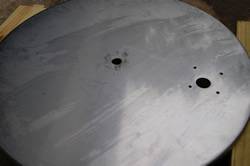
The old flat fermenter lid came off of a 26 gallon conical that was upgraded to a newer dome shaped lid, so the old lid really would never be used again. I’m not sure of the steel gauge, but it was thick. So it was time to breathe new life back into this steel. The lid already had a punched hole on the side which was used for a temperature probe and cork setup, so I measured the tower mounting holes around it. I measured the center of the lid to 11 ½ in. and made my marks. I readied the step bit in the power drill and sprayed it with some WD40 for added lube. It took some time to drill down through the steel and it got extremely hot, so be careful if you are doing this type of drilling. (It’s a good idea to wear protective gloves during this step.) After I drilled my holes I smoothed down the rough edges with my Dremel and grinding stone.

4. ASSEMBLE THE TOP
After drilling all of the needed holes I slipped the beer line down the pre-punched hole and lined up the tower base on the drilled holes in the lid. I imagined this table would be transported at some point, so I used screws and wing nuts, so I could easily remove the tower in the future. With the tower secure I moved on to the middleware, which would connect the keg and table top togehter. I cut out a rough piece of perforated steel to use as a large washer on the bottom of the carboy rack. I placed the fermenter crossbar on the tabletop and from the bottom, with the wing nut screw and washer I secured the rack to the table top. I slide some zip ties up through the holes of the rack for the next step.

5. STABILITY & MOBILITY
I set the tabletop in place on top of the keg and wove the zip ties through the handle holes of the homebrew keg. I cinched the zip ties down as tight as they would go. The table was solid. I chose to use zip ties because they are cheap to replace and you can quickly cut them off when you are done with the keg. (Also consider quick release clamps) When the keg is empty the keg table becomes top heavy, but still is surprisingly stable. When the keg is full you have a nice evenly balanced table that really does not require additional leg support. (You could add leg support if you knew the table would be in a high traffic area that would get bumped around) I was able to quickly move the keg table to the garage, front porch, back porch and home bar area with no problems.

6. INSULATE AND INTAKE
For the finals touches I added a stainless steel drip tray, chalkboard homebrew tap handle and insulated the beer line with some HVAC foam to help hold in the cool temperatures. Though I was building the keg table for colder outdoor weather dispensing I was also thinking about using this indoors for dispensing cask ales at warmer temperatures. You could use a small trashcan filled with ice/water and slip the table base (keg) into it to keep it cool. One last tip is to make sure you line the CO2 keg charger up to be on the front side of the table. This will allow your homebrew tasters the opportunity to charge up the keg themselves adding to the fun of the table.

/Christian Lavender Christian Lavender is a homebrewer in Austin, TX and founder of Kegerators.com and HomeBrewing.com.


Related Home Brewing Projects:
DIY Home Brewing Bar - The ultimate homebrewing home bar with step-by-step plans designed for home brewers.
Build an Insulated Keg Fermenter - Learn how to build an Insulated Keg Fermenter and get more temperature control.
Build a Home Brewing Kegerator Fermentation Chamber - Build a kegerator fermentation chamber for the ideal storehouse for fermenting and lagering beers at different temperatures.