Transforming 15 Gallon Kegs for Home Brewing

The modern beer keg, although designed for industrial use, is very useful to the home brewer. Industrial beer kegs can be transformed into kettles, false-bottomed mashing units, or simply used for draft beer as they were intended. Due to the extreme popularity of home brewing, even these high production units are now being filled with the old home brew thanks to homespun ingenuity. With the acquisition of a few specialty tools, industrial kegs become an efficient way to expand the home brewery. Here we will go over the tools and projects you need to effectively utilize the 15-gallon industrial Sanke beer keg in your home brewery.

15 Gallon Keg for Home Brewing

Our first topic of discussion is getting a-hold of kegs. U.S. Sanke kegs are available in a few different sizes. The most common sizes are quarter barrel and half-barrel beer kegs. Quarter barrel beer kegs are also known as pony kegs, and equal about seven and a half gallons of beer (equivalent to 80 12 oz. beers). Half-barrel kegs are 15 gallons, which equals 160 12 oz. beers. The same tooling will work for either quarter-barrel or half-barrel kegs, in terms of extracting the valve and shank from the kegs.

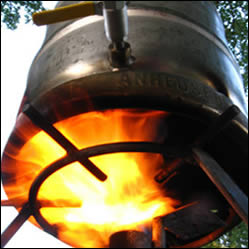
Once you have decided on what size of keg you would like to use, you should be able to get them through your local home brew supply store or scrap metal dealer. Failing that, one could always inquire at your local brewpub or brewery and arrange to buy some of their old kegs. If you are looking for a brand new keg, these sources should be able to point you in the right direction. One tip we can offer for the home brewer is to buy a keg that has no rubber or plastic coating on it. This will allow you to place the keg directly on the fire in order to boil water during the cleaning process, and it will also allow you to transform the keg into a brew kettle if you wish. It is always possible to remove the plastic or rubber via wire wheel, but this is a pain in the rear end.

Whether you start out with a used keg and re-condition it yourself, or buy a re-conditioned or new beer keg, you will want to have the tools to re-build the kegs. The seals will eventually wear out, and so it is a good idea to know what you will be dealing with. A Sanke valve removal kit can either consist of the specialty tool set, or the "shade-tree brewer's" tool set. The pro set will run you about $80 for the valve depressor and about $8 for the Sanke ring removal knife. The "shade-tree brewer's" tool set consists of about a 5/8" wrench instead of the $80 valve depressor. The spring clip remover for the D.I.Y. brewer would be a flathead screwdriver and needle nose pliers.

Once you have a keg, you will want to clean it out. The first part of this process has to do with releasing any leftover pressure in the keg. Whether using a valve depressor, a wrench, or other lever, it is important to point the keg valve AWAY from yourself, the dog, or anything else that would rather not get a beer shower. After depressing the valve and ensuring that there is no pressure left in the keg (called degassing in industrial beer keg parlance), you are ready to tackle the spring lock.

If you have a spring-style ring clip on your keg's valve, you will want to get in there with the screwdriver to pry it off. Be careful not to bend the spring clip too much, or it may become work hardened and fail on you. Some find this difficult, but if you search on youtube you will find many videos that will show you how simple it is to accomplish this.

For beer kegs with ring clips holding in the valves, it is a good idea to drill small holes in the actual clip. The holes need to be just big enough to stick a nail or awl in. These holes are used to lever the ring clip out and back in place.

For cleaning, a pressure washer is a good thing to have on the first round, and brushes as well, but boiling water in the keg is the most practical solution for home brewers. Sanitization should be done with iodophor solution, rinsing, and CO2 pressurization.

The only real transforming of industrial kegs that is done by home brewers is when kegs are turned into brewing kettles. This process is remarkably simple and simply involves cutting the top off of the keg. It is smart to leave the handles on the keg for ease of use. If you are not proficient with machine tools, you can take your legally bought keg down to the industrial part of town and find a machine shop to accommodate you needs. But, as most home brewers are in the D.I.Y. mindset, we must offer these warnings: if using a torch, plasma cutter, or angle grinder, keep in mind that the temper of the steel will be undone by the heat, and rust may appear around where your tool has been used. The use of a metal cutting sawzall or jigsaw, combined with sanding disk or flapper disk finishing is what we recommend.

Related Home Brewing Articles
Building a Keggle: A Keg Conversion Project
Homebrew Kettles
Building an Efficient Outdoor Home Brewery