Basic Homebrew Lab

Tips for setting up a basic homebrew yeast lab

For those home brewers with a desire to know more about the microbiology going on in their home brewery, setting up a yeast lab for capturing, culturing and testing purposes can be an interesting new addition to the home brew workshop. Proper lab equipment will be required for operating a yeast culturing lab and it is a great way to practice and test one's ability to clean and sterilize equipment to a great degree.

But why go to all the trouble? Can't I just buy yeast at my homebrew shop? You sure can and that's what most do, but some like delving deeper into the science side of the hobby. Setting up a homebrew lab will allow you to capture yeast, culture yeast, determine yeast viability and run tests for aerobic bacteria, anaerobic bacteria and wild yeast infections in your brewery.

Capturing and growing yeast can be a very cost effective practice, especially if you are the kind of brewer that likes to make beer with specialty yeast, as some of these specialty yeast strains can cost up to $20 per vial. If you are brewing every two weeks you can culture the yeast from one vial or from a friend's newly pitched wort and have these different strains of yeast available for up to a year after the culture is made. But, if you are brewing occasionally or with inexpensive yeast strains your money might be better spent otherwise.

The first thing to be aware of is the extremely delicate nature of the process of culturing yeast. This is microbiology. You can do it at home, but it is best if you have a safe location in which to store your tools, pots, pans, measures and lab glass where it will not be used for regular kitchen use. Keep the tools you are using cleaned and sanitized at all times to minimize the risk of microbial infection from unwanted sources. The environment you choose to work in can have a big influence on your results. Avoid drafty areas in your home and places with heavy foot traffic.

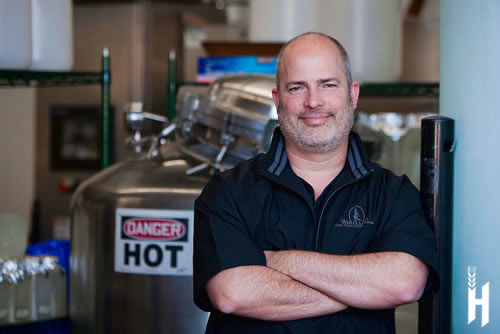
Dr. Chris White over @WhiteLabs fermentation sciences was nice enough to send over some tips for beginner yeast ranchers wanting to set up a basic homebrew lab.

"For focusing, sanitation is number one.  You have to go to more advanced aseptic techniques with slants because when you're working with tiny amounts of yeast, it is even easier to contaminate it than when you are working with large amounts in brewing," Chris said.

"For example, you need to sterilize equipment and media rather than just sanitize them.  For that you need a pressure cooker, in order to get the high temperature steam needed for sterilization."

"Once you have yeast on slants, you should not keep them longer than 2 months, or before then reculture onto a new slant. The chance for yeast drift/mutation increases at the 2 month time period.  When growing yeast up to brew batch sizes, start with no more than 10ml and stick with traditional 10x increases in volume, in wort.  Ideally that wort will be sterilized as well."

Lab Equipment
There is no way around it: you are going to need to buy real lab equipment if you are going to set up a yeast lab and culture various strains of yeast. Cross contamination is always a possibility, so I recommend having a small refrigerator that is dedicated to the storage of your various yeast projects.

The following equipment is suggested to start your home yeast lab:

Homebrew Yeast Lab Equipment List

Binocular style microscope with light source

Pressure Cooker of large size - able to hold test tubes in their rack or in a beaker for sanitization. Needs to be able to handle 15 PSI
Test tubes with corks (about 50 of them)
Test tube racks or a Pyrex beaker that can hold the test tubes and fit inside the pressure cooker
Erlenmeyer Flasks for starting cultures - these must have corks with airlocks
Gelatin or agar powder for producing a malt based growth medium
Pipettes and inoculation loops
Electronic scale
Plenty of sanitation supplies including ethyl alcohol, oxygen cleaners, cotton swabs, iodine solution
Sanitized gloves
A Bunsen Burner to sterilize air and tools that are used to transfer yeast cultures
Graduated beakers and cylinders
A guide or book about yeast culturing, such as Yeast Culturing for the Homebrewer by Rog Leistad, Yeast: The Practical Guide to Beer Fermentation by Jamil Zainasheff and Chris White, or for the more adventurous yeast fan, Wild Fermentation: The Flavor, Nutrition, and Craft of Live-Culture Foods by Sandor Ellix Katz and Sally Fallon.

In order to make yeast at home it is vital to understand the process that yeast undergoes when used in a fermentation. The yeast that is pitched into wort at the beginning of the process is usually not the same yeast that comes out at the end of the process.

The yeast undergoes transformation during its time producing alcohol from the wort - the yeast produces many cells that consume the sugars, reproduce, and then either die or drop out of the solution and go dormant. So the yeast at the end of the fermentation is really quite a few generations removed from the yeast that started the process. This is why if yeast is re-used too many times for different batches of beer it can cause off flavors or sometimes lose its ability to ferment out to its original specifications and vigor.

Slanting
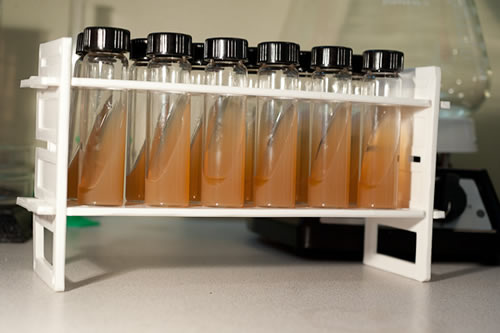
There is a process that is used to culture yeast in a way that removes this problem. Multiple yeast cultures are made from the same starter. These yeast cultures are stored in test tubes in a fridge or freezer specifically set aside to be a sterile storage unit. The yeast stored in such a fashion is called a slant.

This is due to the slightly jellified growth medium which inhabits the test tubes. While this jellified medium is setting and firming up, the tubes are held at a 45 degree angle or so. This slant provides more surface area for the yeast culture to grab onto when it is added to the growth medium. The yeast will mostly live on the surface of the jellified medium just like yeast does naturally on the outside of fruits.

When you set up your home yeast culturing lab it will be important to have every tool and ingredient close at hand and sterilized ahead of time. Many people use dried malt extract in combination with Agar or Gelatin and water to produce the growth medium. Make sure that the medium contains the right specific gravity and nutrients for the yeast to survive and prosper once the slants are inoculated. Keep in mind that you will want to make your slants first and then give them about a week to make sure they are free of contamination before you inoculate them with yeast.

As Dr. White stated, the most important aspect of all of this is maintaining a sterile environment both with regards to your blank slants and the tools you are using to produce the yeast. When you are preparing a yeast starter remember to boil it properly and to be careful with the pitching process. Proper cleaning and sanitizing of used slants and all the tools involved is key to maintaining a sanitized work environment for culturing yeast.

All of this should result in the best possible set-up for making your home yeast culture lab. With a little attention to detail, you can be well on your way to becoming a fledgling garage microbiologist. If you find culturing yeast at home to be a snap then you are ready to start experiments like contamination detections, cell counting, viability, vitality, storage and propagation.

For detailed yeast management techniques and loads of other yeast lab information you should read Yeast - The Practical Guide to Beer Fermentation. There are in-depth chapters on setting up your lab, culturing yeast, capturing yeast and running quality assurance on your home brewery.

Want to see more Homebrew Books?

Christian Lavender is a father, husband, computer geek, homebrewer and founder of Kegerators.com and HomeBrewing.com in Austin, TX.

Follow Christian's brewing on