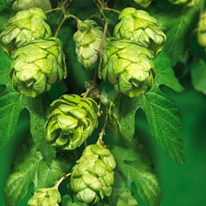
Growing Hops At Home

Growing hops at home can be a fun gardening activity for those who truly wish to make their beer from scratch. The hop plant (Humulus Lupulus) is a perennial plant, meaning that the plant lives from year to year for a number of years, always growing again from a sturdy root. The vines of the hops plant grow fast and long (up to 25 feet) and then die back each fall, but the root of the plant lives on in this cycle of growth.

Growing Hops at Home

The plant also grows underground stems called rhizomes that creep out beneath the soil to pop up a few feet away and start a new plant growing. Rhizomes are the way that home brewers share their hops plants - each rhizome is like a clone of the mother plant. These rhizomes are available from hop farmers, through mail order, and at your local home brewing store. Once you begin growing hops of your own, you will not want to wait for the chance to use them to produce a fresh, hoppy beer, and the abundance of hops at harvest will give you the chance to try dry hopping your ale - putting fresh hops right into the carboy. Of course, you try dry hopping with commercially grown hops, but the result will not be as flavorful - or rewarding - as dry hopping with your own homegrown hops.

There are a hug variety of hops to choose from when growing your own hops plant. Make sure you do the research and look back over your beer recipes for the varieties of hops that have produced your favorite batches of beer. You will most likely want to start off by growing just one variety of hops, but if you really can't make up your mind, you can always get two varieties of rhizome, one male and one female, and eventually you will have a hybrid plant, if you take good care of them over the years.

Hops are generally grown both north and south of the equator, and a hardy plants no matter what the altitude they are grown. They should be planted early in spring, but after any chance of frost, which might kill them. Keep in mind that the hop vines can yield up to two pounds of dry hops per plant, which is a lot heavier when they are wet and growing. You will need to build a strong latticework structure for the hops to grow on, preferably next to a strong fence or wall. The first year of growth, a hops plant needs a lot of attention (like most plants), so remember to water it often, as part of your daily schedule, but not too much.

Further down the road after planting, you can increase the yield of hops from your hoppy little plant by trimming a few of the initial rush of vines. By trimming the hops plant a little, more growth in stimulated in the plant, but make sure not to cut too much. Always choose the strongest vines to stay (at least three), and then trim back the weaker ones. This process is best done when the vines have reached about one foot long. Later on, during the summer, it is wise to cut back the lower parts of the plant to avoid plagues and insects from attacking your plant.

Remember that the first year of growing hops will not yield very much in terms of flowers. Your second year hops will be the strongest in this regard, especially if you take care to prune them twice a year as explained previously. When the harvest time comes, however, it is best to lower your whole trellis to pick the hops. This way, you will not hurt yourself by climbing up an 18-foot ladder with a harvesting basket.

Drying your harvest properly is an important step for those growing hops on their own. By using a dehydrator, custom hop dryer, an oven, or even sun drying, you can get your hops free of moisture, which is very important for the storage of the part of your harvest you don't use right away. Make sure that the stems of the hops are dry enough to break instead of bend - this is how you know your hops are done drying. The process usually takes only three days or so. Then you will be ready to start dry hopping your homebrew with your own hops!

Some hazards to watch out for when growing hops are spider mites, aphids, and mold. Even though your harvest may duffer from it, we recommend utilizing better growing techniques rather than pesticides and fungicides to get rid of these pests. The main concern with growing organically is knowing what conditions make it easy for these pests and mold to grow and then remove those conditions from your garden. This is most easily done preemptively. Mold problems can be avoided by planting the hops in the sunniest space in your garden. Building a mound of organic soil allows drainage so that your root won't get drowned in the rain, and also makes it easier to discover and harvest rhizomes for panting new hop plants. By using drip instead of spray irrigation, you can also limit the amount of moisture that is collected on the leaves of your plant. Also, remember that proper aeration of your hop beds are important for growing these plants - that means, nice soft soil that is easily turned.

By following these simple tips, we are sure that you will be able to successfully grow your own hops. Once you have harvested and made fresh hoppy beer with your own hops, you will probably not want to go back to buying hops. Dry hopping will become second nature to you, and you may find your beers becoming packed more and more with fruity and bitter hoppy flavors.